
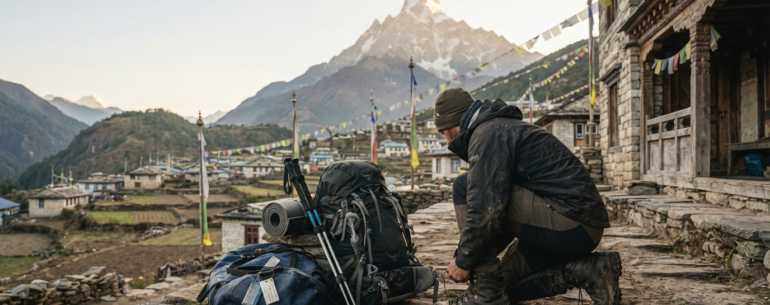

Everything you need to know before setting foot on the trail—from trekking boots and base layers to the gear you can confidently rent in Kathmandu.
| Last Updated | Best For | Ideal For | Author |
|---|---|---|---|
| August 2026 | Everest, Annapurna, Langtang & Manaslu Treks | First-time & Independent Trekkers | Abhay Gautam Content Editor, Cold Feet |
Most trekkers only need to bring quality hiking boots, base layers, trekking clothing and personal essentials from home. Bulky items such as down jackets, sleeping bags, trekking poles and duffel bags are widely available to rent in Kathmandu, allowing you to travel lighter without sacrificing comfort.
At a Glance
| Bring From Home | Rent in Kathmandu | Buy in Thamel |
|---|---|---|
| Trekking boots | Down jacket | Buff |
| Base layers | Sleeping bag | Water purification tablets |
| Sunglasses | Trekking poles | Snacks |
| Personal medication | Duffel bag | Power bank |
Editorial Note
This guide is based on years of helping trekkers prepare for journeys across the Himalayas—not on affiliate commissions or sponsored recommendations. We’ve seen what people consistently overpack, what they often forget, and what proves genuinely useful after days on the trail. Every recommendation comes from real experience preparing trekkers for Nepal’s most popular routes.
Introduction
Imagine standing at 5,000 metres, surrounded by some of the highest mountains on Earth. The first light of morning catches the summit of Ama Dablam while prayer flags stir gently above a quiet Himalayan village. It is a moment you’ve imagined for years.
Now imagine every step hurting because your boots were never properly broken in.
Or lying awake through the night because your sleeping bag wasn’t designed for Himalayan temperatures.
In the mountains, comfort is never a luxury. It is what allows you to enjoy the journey.
Packing for a trek in Nepal isn’t about carrying more—it’s about carrying better. The most experienced trekkers are rarely the ones with the biggest backpacks. They’re the ones who know exactly what they’ll need, and what they’ll never touch.
After preparing trekkers for departures from our office in Thamel season after season, we’ve heard the same questions again and again. Do I need an expensive sleeping bag? Should I bring a down jacket? Can I buy trekking gear in Kathmandu?
The good news is that you don’t need to spend thousands of dollars on expedition equipment before arriving in Nepal. Between the gear you bring from home and the equipment available throughout Kathmandu’s famous trekking district, it’s entirely possible to build an excellent kit without overpacking or overspending.
Whether you’re trekking to Everest Base Camp, Annapurna Base Camp, the Annapurna Circuit, Langtang Valley, or Manaslu, this guide explains exactly what to bring, what to rent, what to buy in Kathmandu, and what you can confidently leave behind.
Before You Pack: Nepal’s Trekking Rules & Packing Strategy
If you’ve been reading older guidebooks or browsing years-old travel forums, you’ll probably come across advice suggesting you’ll be carrying all of your equipment in a large expedition backpack.
For most trekkers in Nepal today, that advice is no longer accurate.
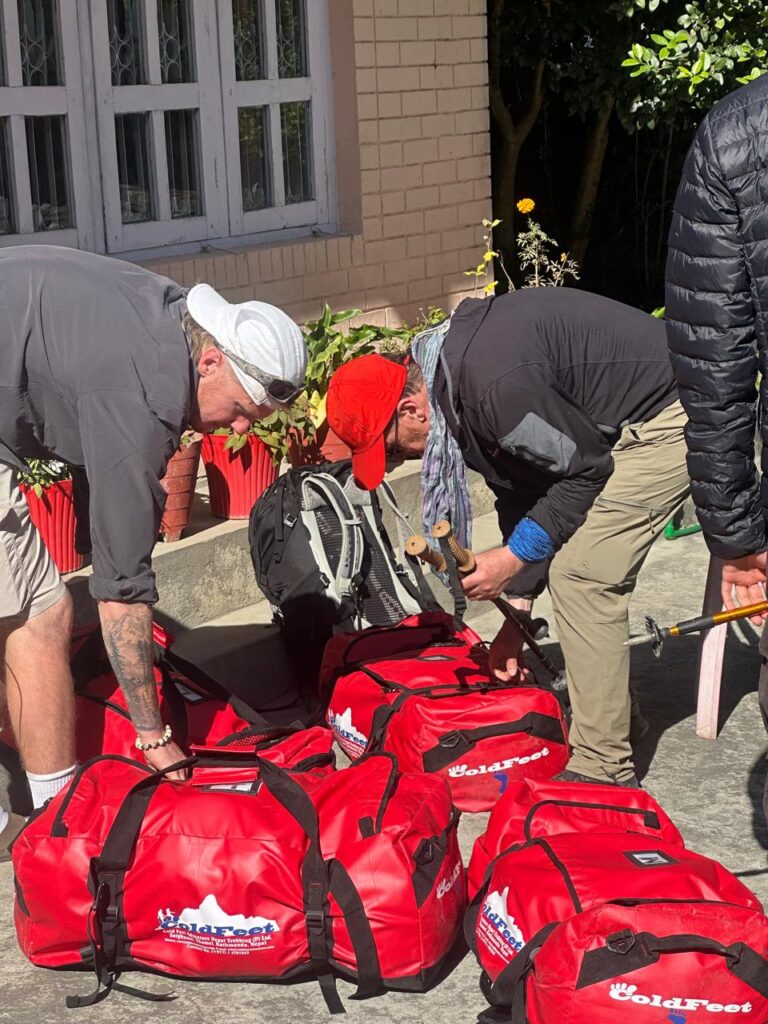
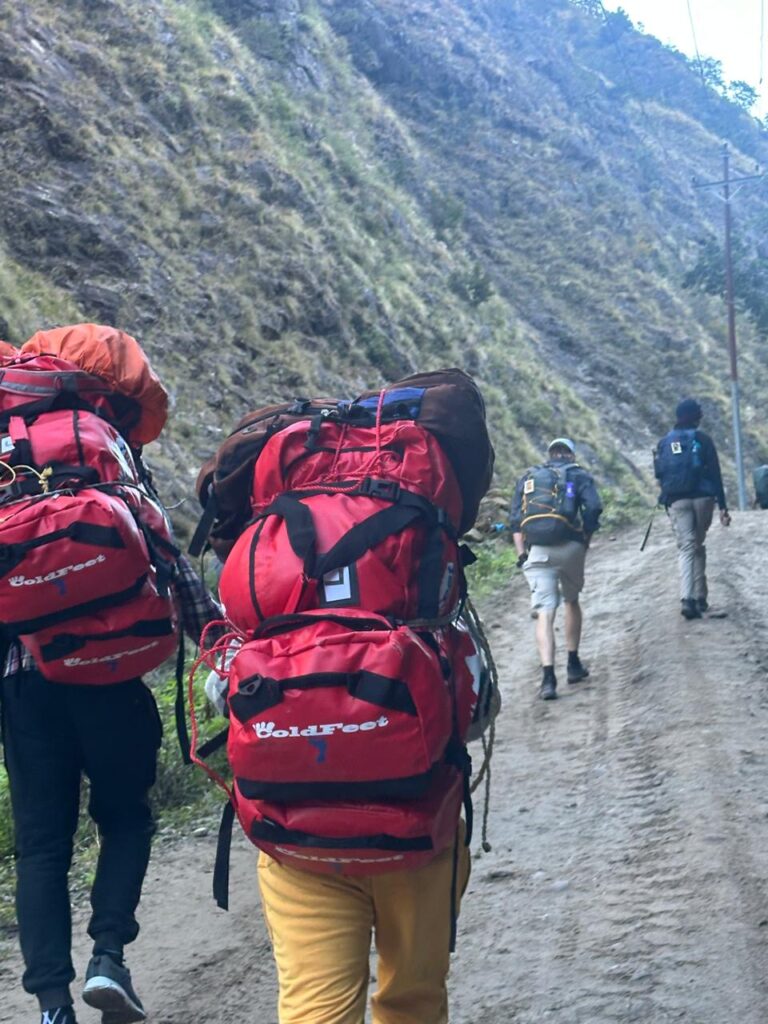
Many of Nepal’s most popular trekking routes are now undertaken with a licensed guide, and most groups are accompanied by a dedicated porter. Whether you’re trekking to Everest Base Camp, Annapurna Base Camp, the Annapurna Circuit, Langtang Valley, or the Manaslu Circuit, you’ll usually divide your gear between two bags: a larger duffel bag carried by the porter and a small daypack that stays with you on the trail.
Rather than adding inconvenience, this actually changes the way you should pack. Understanding the difference between these two bags is one of the easiest ways to avoid overpacking before you even leave home.
Do I need to carry my own backpack while trekking in Nepal?
On most guided teahouse treks, no. Your main duffel bag is carried by a porter, while you walk with a light daypack containing the items you’ll need throughout the day. This makes trekking more comfortable and helps reduce fatigue.
Your Porter Carries
Your main duffel bag—typically limited to 12–15 kg—should contain the items you’ll only need in the morning, evening, or once you’ve reached the teahouse.
- Sleeping bag
- Down jacket
- Spare clothing
- Toiletries
- Camp shoes
- Extra layers
- Charging cables and power bank
- Personal items not needed during the day’s walk
You Carry
Your daypack should remain light and comfortable. A weight of around 5–7 kg is more than enough for most trekkers. Carry only what you’ll regularly use throughout the day.
- Water bottle or hydration bladder
- Waterproof jacket
- Snacks
- Camera
- Gloves
- Sunglasses
- Passport
- Personal medication
- Sunscreen
- Phone
- Power bank
For most trekkers, a 30–40 litre daypack is the ideal size. Anything significantly larger usually encourages unnecessary packing.
Did You Know?
Every unnecessary kilogram you pack is eventually carried by someone—either you or your porter.
Packing responsibly isn’t only about your own comfort. It’s also a simple way of showing respect for the people who help make Himalayan trekking possible.
The Three-Layer System
Staying Comfortable in Nepal’s Changing Mountain Weather
One of the biggest surprises for first-time trekkers isn’t how cold the Himalayas become.
It’s how often the temperature changes in a single day.
You might leave your teahouse before sunrise wearing gloves and a down jacket, spend the afternoon climbing beneath warm mountain sunshine in nothing more than a lightweight base layer, then find yourself reaching for every warm piece of clothing you packed as soon as the sun disappears behind the ridgeline.
The mountains don’t stay one temperature.
Your clothing shouldn’t either.
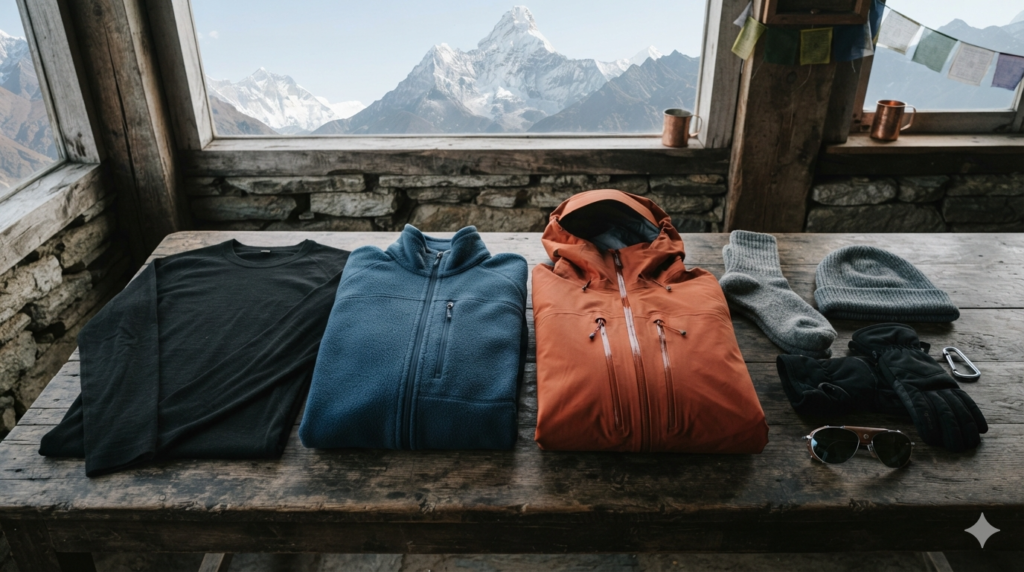
That’s why experienced trekkers rely on the three-layer system. Rather than depending on one thick jacket to solve every situation, each layer has a single job. Together, they keep you comfortable across a remarkably wide range of temperatures while allowing you to adapt as conditions change throughout the day.
It’s a system used everywhere from the Alps to the Himalayas, and once you understand it, packing becomes much simpler.
Cold Feet Tip
If you’re choosing between buying an expensive jacket and investing in a quality base layer, choose the base layer first. Staying dry has a greater impact on comfort than simply wearing thicker clothing.
Layer 1 — Base Layer
Think of this as your second skin.
Its purpose isn’t to keep you warm.
Its purpose is to keep you dry.
As you climb, your body generates a surprising amount of heat. Even on cold mornings, it’s common to begin sweating during long uphill sections. If that moisture stays trapped against your skin, it quickly becomes uncomfortable once you stop walking or the temperature begins to fall.
A good base layer moves sweat away from your body so it can evaporate more easily, helping you stay warm even after you’ve finished climbing.
Pack
- Two lightweight merino wool or synthetic thermal tops
- Two thermal bottoms
Merino Wool or Synthetic?
| Feature | Merino Wool | Synthetic |
|---|---|---|
| Temperature regulation | Excellent | Very Good |
| Drying speed | Good | Excellent |
| Odour resistance | Excellent | Fair |
| Comfort over multiple days | Excellent | Good |
| Price | Higher | Lower |
| Best For | Longer treks | Budget-conscious trekkers |
Both work well. The important thing is choosing moisture-wicking materials rather than cotton.
Common Mistake
Cotton absorbs moisture, dries slowly and loses much of its insulating ability once it becomes wet. At lower elevations, that’s simply uncomfortable. High in the Himalayas, it can leave you feeling cold much sooner than expected once you stop moving.
Layer 2— Insulation
If your base layer manages moisture, your insulation layer manages warmth.
Its job is to trap the heat your body naturally produces while still allowing excess warmth to escape during steady climbing.
For most trekkers, this becomes the layer worn most frequently throughout the day.
Pack
Choose one of the following:
- Mid-weight fleece jacket
- Lightweight synthetic insulated jacket
Fleece remains popular because it continues to insulate reasonably well even when damp and is generally more affordable.
Lightweight synthetic insulated jackets are warmer for their weight and compress more easily inside your backpack.
Either option works well.
Many experienced trekkers simply choose whichever they already own.
Layer 3 — Weather Protection
The outer shell protects you from everything the Himalayas throw at you.
- Wind
- Rain
- Snow
- Dust
Rather than providing warmth itself, a shell protects the layers underneath so they can continue doing their jobs.
Look for:
- Waterproof construction
- Windproof fabric
- Breathable membrane (such as GORE-TEX or an equivalent)
- Underarm ventilation zips
- A hood large enough to fit comfortably over a warm hat
If you’re trekking during spring or autumn, waterproof trekking trousers are also worth bringing. Afternoon showers and occasional snowfall are common enough that having dry legs can make a long day considerably more comfortable.
A shell shouldn’t feel bulky.
Its purpose isn’t to keep you warm.
It’s to keep everything else working properly.
Cold Feet Tip
Don’t leave the teahouse wearing every warm layer you own — you’ll likely be too warm within twenty minutes of climbing. Start slightly cool. The first uphill stretch generates enough heat on its own.
Footwear: The Most Important Choice You’ll Make
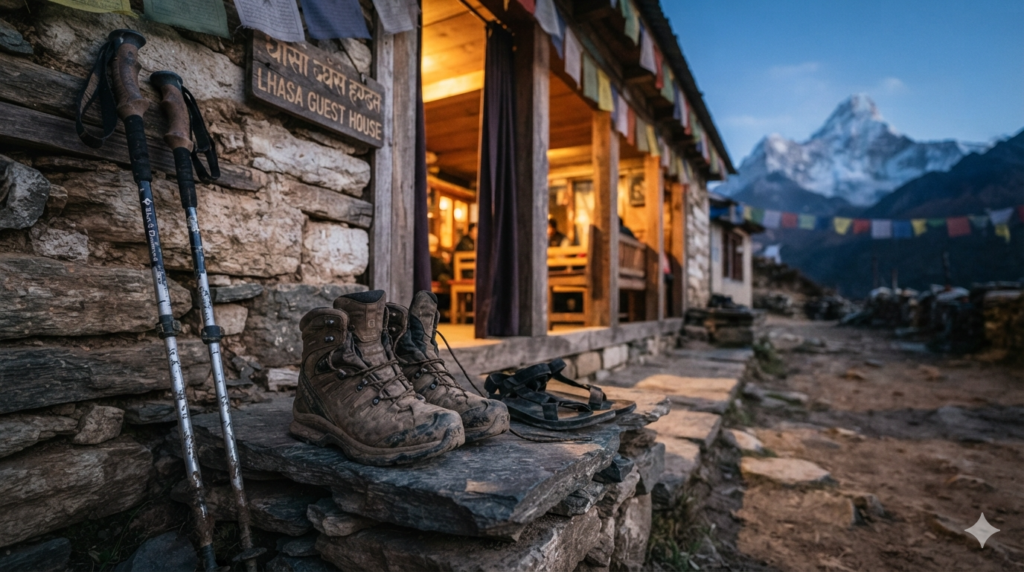
You can get away with an inexpensive rain jacket.
You can rent a down jacket in Kathmandu.
You can even forget a few small accessories.
But a poor pair of hiking boots has the potential to end your trek long before you reach your destination.
More than any other piece of gear, your footwear determines how comfortable you’ll feel after consecutive days of walking. Good boots provide stability on uneven trails, protect your ankles on steep descents, and help keep your feet dry when crossing streams, muddy paths or unexpected snowfall.
Trekking Boots
Look for:
- Waterproof construction (such as GORE-TEX or an equivalent membrane)
- Mid or high ankle support
- A stiff sole with deep, aggressive tread
- Comfortable toe room for downhill walking
- A secure fit without pressure points
Quality boots don’t have to be the most expensive pair on the shelf. The best boots are the ones that fit your feet comfortably and have already been broken in before you arrive in Nepal.
Common Mistake
Buying brand-new hiking boots in Kathmandu a day or two before your trek.
Even the highest-quality boots need time to mould to your feet. Wear them on local walks and day hikes at home well before travelling to Nepal. Arriving with boots that already feel like old friends is one of the best investments you can make in a successful trek.
Before You Buy
- ✓ Waterproof construction
- ✓ Good ankle support
- ✓ Deep, grippy tread
- ✓ Comfortable fit with trekking socks
- ✓ Broken in before arriving in Nepal
Camp Shoes
After six or seven hours on the trail, the first thing most trekkers want to do is take off their boots.
A lightweight pair of camp shoes makes evenings in the teahouse considerably more comfortable. Simple sandals, lightweight sneakers or Crocs are all excellent choices. Pair them with warm trekking socks and you’ll appreciate the relief while relaxing in the dining room, walking to the bathroom, or stepping outside on cold mornings.
They’re light, inexpensive and surprisingly easy to justify once you’ve spent your first full day in hiking boots.
Cold Feet Tip
Choose camp shoes that can also be worn in shared bathrooms and around wet shower areas. They serve two purposes while adding very little weight to your pack.
Expensive boots don’t prevent blisters.
Broken-in boots do.
Socks: The Smallest Piece of Gear That Makes the Biggest Difference
When people prepare for their first Himalayan trek, they spend weeks researching boots.
Few give the same attention to the socks they’ll wear inside them.
It’s an easy mistake to make.
A well-fitted boot paired with poor-quality socks can still lead to blisters, cold feet and uncomfortable days on the trail. Good trekking socks don’t simply add warmth—they reduce friction, cushion your feet and help manage moisture throughout long days of walking.
Sometimes, the smallest piece of equipment has the biggest impact.
How Many Pairs Should You Pack?
For most treks lasting between one and two weeks, three to four pairs of quality trekking socks are more than enough.
Most trekkers alternate between two or three pairs while allowing the others to dry overnight inside the teahouse. Merino wool, in particular, stays remarkably fresh even after several days of use.
Packing ten pairs usually means carrying six you’ll never wear.
Merino Wool or Synthetic?
| Merino Wool | Synthetic |
|---|---|
| Excellent temperature regulation | Faster drying |
| Outstanding odour resistance | More affordable |
| Ideal for multi-day trekking | Ideal for shorter treks |
Whichever material you choose, make sure your socks are designed for hiking rather than everyday use.
Common Mistake
Cotton socks absorb moisture, create friction inside your boots and significantly increase the likelihood of blisters. Leave them at home.
Cold Feet Tip
Bring one extra pair of dry socks exclusively for the evenings.
After a full day of trekking, changing into a clean, warm pair before dinner feels disproportionately rewarding.
Keep them inside your sleeping bag overnight and they’ll be warm when you wake up the following morning.
Boots line the entrance. Wet socks hang above the stove. Steam rises from the tea while tomorrow’s weather becomes the evening’s main topic of conversation. That’s teahouse life.
Hands, Head & Sun Protection
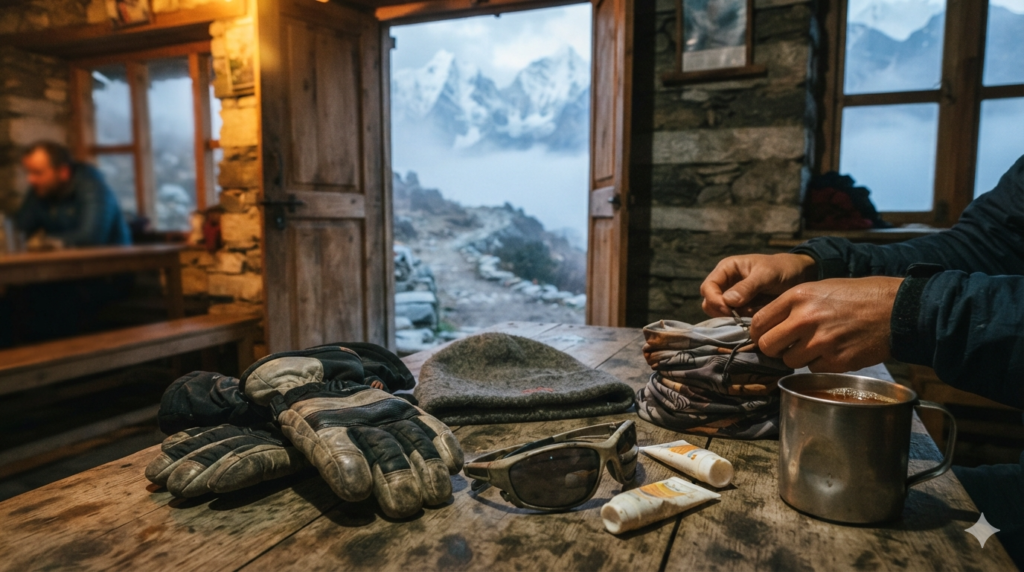
The Himalayas have a way of keeping you warm and cold at exactly the same time.
Your body may be working hard on a steep climb while a cold wind numbs your fingers. The morning air can feel close to freezing, only for the afternoon sun to become surprisingly intense at altitude.
That’s why protecting your hands, head and face is less about carrying bulky clothing and more about preparing for rapidly changing conditions.
Gloves
Pack one good pair of insulated gloves.
For spring and autumn treks, lightweight fleece or softshell gloves are usually sufficient. If you’re trekking during winter or expect heavy snowfall, consider waterproof insulated gloves instead.
Warm Hat
A lightweight wool or fleece beanie quickly becomes part of your evening routine. You’ll appreciate it during cold starts before sunrise, around the dining room after dark and whenever strong winds begin sweeping across exposed ridges.
Sun Hat
Many first-time trekkers prepare for the cold.
Far fewer prepare for the Himalayan sun.
At higher elevations, ultraviolet radiation is considerably stronger than most people expect. A lightweight cap or wide-brimmed hiking hat provides welcome protection during long hours above the tree line.
Buff or Neck Gaiter
If we could recommend one surprisingly versatile piece of trekking gear, it would be a simple buff.
It can become a neck warmer on cold mornings, a face covering during dusty sections of trail, a lightweight hat, a headband or even an improvised wristband.
For something that weighs almost nothing, it solves an impressive number of small problems.
Sunglasses
Choose sunglasses with 100% UV protection.
Category 3 lenses are suitable for most trekking conditions, while Category 4 glacier glasses are worth considering for more technical alpine terrain.
Sunscreen & Lip Balm
Pack a broad-spectrum sunscreen with SPF 50+ and reapply it throughout the day, particularly after lunch when the sun is strongest.
A small tube of lip balm with SPF protection is equally worthwhile.
Cold Feet Tip
Keep your gloves, hat and buff in the top pocket of your daypack—not buried underneath your lunch.
Mountain weather rarely gives you much warning.
Trekking Poles: The Piece of Gear You’ll Appreciate Most on the Way Down
Most first-time trekkers assume trekking poles are designed to make uphill climbs easier.
Experienced trekkers usually discover the opposite.
The greatest benefit of trekking poles reveals itself on the descent.
Long after the excitement of reaching a mountain pass has faded, your knees are still absorbing thousands of impacts as you make your way down uneven stone steps, loose gravel and steep mountain trails. A good pair of trekking poles shares some of that workload with your arms, improving balance while reducing strain on your knees and ankles.
By the third or fourth day of trekking, the difference becomes surprisingly noticeable.
Do You Really Need Trekking Poles?
Strictly speaking, no.
Thousands of trekkers complete Himalayan trails without them every year.
But very few people who try trekking poles for the first time finish their trek wishing they’d left them behind.
They provide extra stability on slippery trails, confidence while crossing streams and better balance when carrying a daypack over uneven terrain. They’re especially valuable at higher altitudes, where fatigue can make even straightforward sections of trail feel less stable than they would at sea level.
For longer routes such as the Everest Base Camp Trek, Annapurna Circuit and Manaslu Circuit, trekking poles are one of the simplest ways to reduce cumulative fatigue over consecutive days of walking.
Did You Know?
Studies have shown that trekking poles can significantly reduce the load placed on your knees during long descents. While they won’t make a steep trail feel easy, they do help distribute effort more evenly across your body, making long trekking days noticeably less tiring.
Adjustable or Fixed?
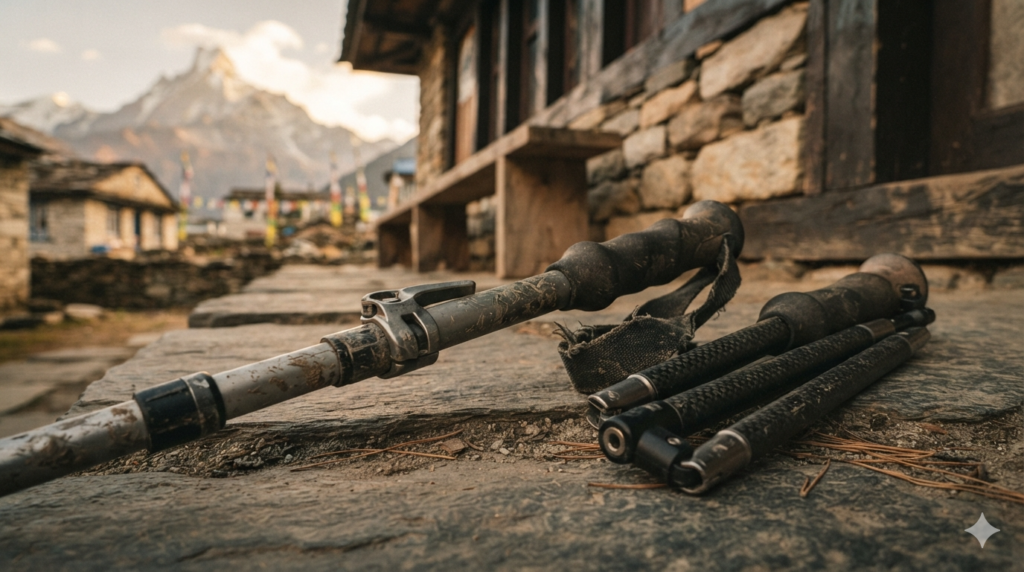
For most trekkers, adjustable poles are the better choice.
They allow you to shorten the poles during steep climbs and lengthen them on descents, helping you maintain a more natural posture throughout the day. Collapsible poles are also much easier to pack inside your duffel bag during flights and transfers.
If you’re renting trekking poles in Kathmandu, most trekking shops provide adjustable aluminium poles that are perfectly suited to the majority of trekking routes.
Carbon fibre poles are lighter but considerably more expensive and slightly more prone to breaking under heavy impact.
For most trekkers, aluminium strikes the best balance between durability, performance and value.
How to Use Trekking Poles Properly
Many first-time trekkers carry poles without adjusting them correctly.
As a general rule, when standing on level ground with the pole tip touching the ground, your elbow should form roughly a 90-degree angle.
- Shorten the poles slightly for steep uphill climbs.
- Lengthen them for long descents.
- Keep your shoulders relaxed.
- Let your arms swing naturally as you walk.
Small adjustments throughout the day make a noticeable difference in both comfort and efficiency.
Should You Bring Them or Rent Them?
If you already own a comfortable pair, bring them.
If not, renting in Kathmandu is usually the smarter option.
Quality trekking poles are widely available throughout Thamel at reasonable daily rates, making them one of the easiest pieces of equipment to rent rather than purchase.
Before leaving the shop, extend both poles fully and check that every locking mechanism holds securely.
A thirty-second inspection in Kathmandu is far easier than discovering a slipping pole halfway up a mountain.
Cold Feet Tip
Don’t grip the handles too tightly.
Your hands should stay relaxed, allowing the wrist straps to carry much of the load. Many trekkers unknowingly tire their forearms simply by squeezing the handles all day.
Water, Bottles & Purification: Drink Safely Without Leaving a Trail of Plastic
Few things are more important on a Himalayan trek than staying hydrated.
The higher you climb, the harder your body works. Dry mountain air, long days of walking and increasing altitude all cause you to lose more water than you might realise. By the time you feel thirsty, you’re often already mildly dehydrated.
Good hydration isn’t just about comfort.
It helps maintain energy levels, supports recovery after long days on the trail and gives your body the best chance to adapt comfortably as you gain altitude.
Can You Drink Tap Water in Nepal?
No, visitors should not drink untreated tap water in Nepal.
In cities and villages, untreated tap water should generally be avoided by visitors.
The same applies to untreated water from taps and streams along trekking routes.
Fortunately, safe drinking water is easy to find throughout Nepal’s trekking regions—you simply need the right approach.
Instead, refill a reusable bottle with boiled or filtered water from teahouses, or purify water yourself using tablets, a UV purifier or a portable filter.
The Most Responsible Way to Stay Hydrated
Every teahouse along Nepal’s popular trekking routes offers safe drinking water.
Rather than buying disposable plastic bottles every day, most experienced trekkers carry a reusable bottle and refill it throughout the journey.
Depending on the village, you’ll usually have several options:
- Boiled drinking water sold by teahouses
- Filtered refill stations in some villages
- Tap water treated using your own purification method
Not only is this more economical over the course of a two-week trek, it’s also significantly better for the fragile Himalayan environment.
Did You Know?
A single reusable bottle can replace dozens of disposable plastic bottles during a two-week trek.
It’s one of the simplest ways to reduce your environmental impact without sacrificing convenience or safety.
Water Purification Options
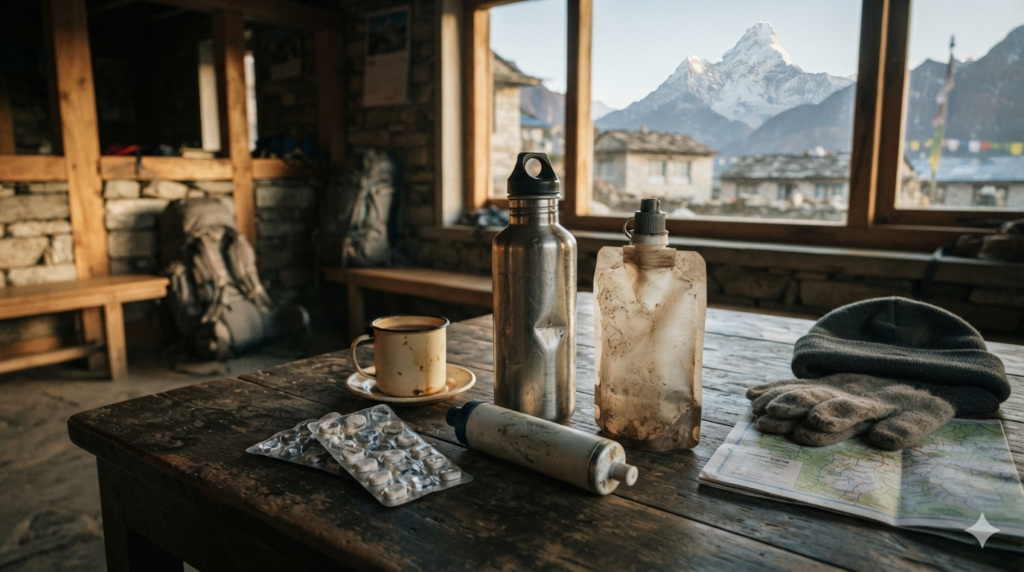
There isn’t a single “best” solution.
Each trekker has different preferences.
Purification Tablets
- Lightweight
- Inexpensive
- Easy to carry
- Excellent as a backup
Some people notice a slight taste after treatment, but they remain one of the most reliable emergency options.
UV Purifiers
Devices such as the SteriPen use ultraviolet light to neutralise microorganisms in clear water.
They’re fast, effective and preserve the taste of the water, but they rely on charged batteries, making a power bank essential for longer treks.
Portable Water Filters
Portable filters remove bacteria and sediment without affecting taste.
They’re especially popular with trekkers who spend extended periods in the mountains or hike regularly around the world.
How Much Water Should You Carry?
For most trekking days, 1.5–2 litres is sufficient.
Some trekkers prefer carrying two one-litre bottles, while others use a hydration reservoir inside their backpack.
Either system works well.
The important part isn’t the container.
It’s drinking small amounts consistently throughout the day rather than waiting until you feel thirsty.
Hot Water Is Worth Carrying
One small luxury quickly becomes a daily ritual in the Himalayas.
Before leaving each morning, ask your teahouse to fill one of your bottles with hot water.
On cold starts, a warm drink makes the first few kilometres considerably more enjoyable. At higher elevations, many trekkers also appreciate having warm water available throughout the day instead of drinking ice-cold water in freezing temperatures.
As a bonus, that same bottle can double as a makeshift hot-water bottle inside your sleeping bag at night.
Cold Feet Tip
Carry two reusable bottles instead of one.
Keep one filled with ordinary drinking water and the other with warm water.
You’ll probably use both every single day.
After a few days on the trail, the sound of plastic bottles disappears from the dining room — replaced by dented metal bottles and well-used Nalgenes that have made it through countless Himalayan seasons. Every refill is one less bottle carried in, and one less carried back out.
Why We Encourage Refillable Bottles
The Himalayas are one of the most extraordinary mountain environments on Earth.
They’re also one of the most challenging places to manage waste.
Every disposable plastic bottle purchased on the trail must eventually be transported out of remote villages, often along the same paths that brought it in.
Choosing a reusable bottle won’t solve that challenge on its own.
But it’s one of the simplest decisions every trekker can make to reduce their impact while travelling more responsibly through the mountains.
Electronics: What You’ll Actually Use on the Trail
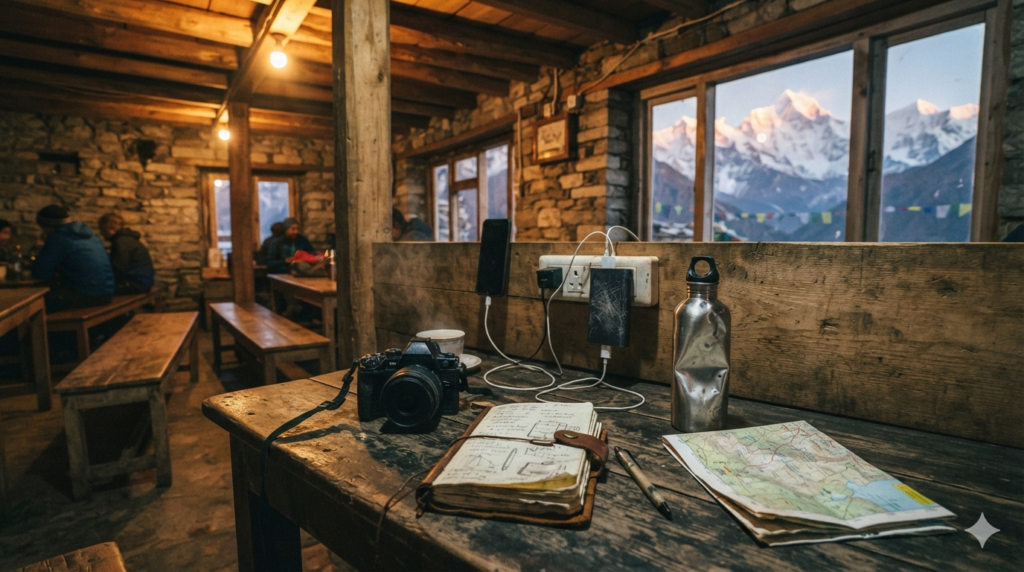
Modern trekking doesn’t mean leaving technology behind.
Most trekkers carry a phone, camera, smartwatch or e-reader into the mountains. Used thoughtfully, these devices can make your journey more enjoyable without adding unnecessary weight to your backpack.
The key is bringing the essentials—not your entire charging station.
Your Phone Is More Than a Camera
For many trekkers, a smartphone becomes the most useful piece of electronics they carry.
It serves as a camera, notebook, map, flashlight, alarm clock and emergency communication device—all in something that fits comfortably in your pocket.
Before leaving Kathmandu, download offline maps using apps such as Organic Maps or MAPS.ME. While Nepal’s trekking trails are generally well established, offline maps provide reassurance and help you identify nearby villages, viewpoints and elevation profiles without relying on mobile reception.
Remember to switch your phone to airplane mode whenever you’re not using it. Battery life improves dramatically at higher altitudes.
Did You Know?
Mobile reception is available in many parts of the Everest, Annapurna and Langtang regions, but coverage becomes less reliable as you gain altitude. Downloading maps before leaving Kathmandu means you’ll still have navigation even without a signal.
Bring a Power Bank
Electricity is available in most teahouses along Nepal’s popular trekking routes, but charging your devices is rarely free.
As you climb higher, many lodges charge a small fee for each device, partly because electricity often comes from solar panels or small hydroelectric systems.
A 10,000–20,000 mAh power bank is usually enough to keep a phone, camera or smartwatch running comfortably for several days between charges.
If you’re trekking for two weeks and taking plenty of photos or videos, it’s easily one of the most useful items you’ll pack.
Cameras
The best camera is the one you’ll actually carry.
Some trekkers bring mirrorless cameras with interchangeable lenses to capture Nepal’s extraordinary landscapes. Others rely entirely on modern smartphones, which are now capable of producing exceptional photographs.
Neither approach is wrong.
Remember that every additional lens also adds weight. If photography isn’t the primary purpose of your journey, travelling with one versatile lens often proves far more enjoyable than carrying an entire camera bag.
Sometimes the best moments happen too quickly to change lenses.
Charging in the Mountains
Charging points are available in nearly every teahouse, although they aren’t always located inside your bedroom.
You may be asked to leave your devices charging in the dining room or pay a small fee depending on the location and altitude.
Charging generally becomes more expensive as you climb higher, so it’s worth arriving each evening with enough battery remaining to avoid unnecessary top-ups.
If your wall charger has multiple USB ports, you can charge several devices at once while carrying fewer cables.
Cold Weather and Batteries
Cold temperatures reduce battery performance much faster than most people expect.
A phone that easily lasts an entire day at home may lose its charge surprisingly quickly on a freezing Himalayan morning.
Keep your phone, spare camera batteries and power bank inside your sleeping bag overnight or in an inside jacket pocket while walking.
A little warmth goes a surprisingly long way towards preserving battery life.
Cold Feet Tip
Pack one small dry bag or waterproof pouch for your electronics.
Mountain weather changes quickly, and protecting your phone and camera from an unexpected downpour is far easier than trying to dry them afterwards.
Do You Need a Drone?
Nepal’s mountains look spectacular from the air.
However, bringing a drone isn’t as straightforward as many travellers assume.
Drone flights are regulated in Nepal, and flying within national parks, heritage sites or near airports may require permits or additional permissions. Many trekking regions also have restrictions designed to protect wildlife, local communities and the experience of other trekkers.
If aerial photography is important to your trip, research the latest regulations before travelling rather than assuming you can fly wherever you like.
There’s a moment on almost every trek when people quietly put their cameras away — not because the view stops being beautiful, but because some moments ask to be experienced before they’re photographed. Those are usually the ones people remember most.
Health, First Aid & Personal Medication
A well-prepared first aid kit isn’t about expecting something to go wrong.
It’s about making sure that small problems stay small.
The vast majority of trekkers complete their journey needing nothing more than a plaster, a blister patch or a mild pain reliever. But in the mountains, where the nearest pharmacy may be several days’ walk away, carrying a few carefully chosen essentials provides both convenience and peace of mind.
Remember that your guide will usually carry a comprehensive group first aid kit.
Your personal kit doesn’t need to duplicate everything. Instead, it should contain the items you may need yourself during the trek.
Your Personal First Aid Kit
A small pouch is usually all you’ll need.
Pack:
- Personal prescription medication
- Adhesive bandages (plasters)
- Blister plasters or blister tape
- Antiseptic wipes
- A small roll of sports tape
- Mild pain relief (such as paracetamol or ibuprofen)
- Anti-diarrhoeal medication
- Oral rehydration salts
- Antihistamines
- A few safety pins
Most of these items weigh very little but can make an enormous difference when you’re several days from the nearest town.
Did You Know?
Blisters are one of the most common reasons trekkers experience discomfort on the trail.
Treating a “hot spot” as soon as you notice it is far easier than dealing with a fully developed blister the next day.
If You Take Prescription Medication
Bring enough medication for your entire trek, plus a few extra days in case of travel delays.
Keep medication in its original packaging whenever possible, and pack it inside your daypack rather than your porter bag so it’s always available when you need it.
If your medication requires refrigeration or special storage, speak with your doctor before travelling.
What About Altitude Medication?
Many trekkers ask about Diamox (Acetazolamide) before arriving in Nepal.
Diamox can help reduce the risk of Acute Mountain Sickness (AMS) for some people, but it isn’t something everyone needs, nor should it replace a sensible itinerary.
The most effective ways to reduce the risk of altitude illness remain remarkably simple:
- Ascend gradually.
- Stay well hydrated.
- Take acclimatisation days seriously.
- Listen to your body.
- Never ignore symptoms of altitude sickness.
If you’re considering taking Diamox, discuss it with your doctor before your trip so you understand both the potential benefits and possible side effects.
Looking After Yourself on the Trail
Good health in the mountains often comes down to small daily habits.
- Wash your hands before meals whenever possible.
- Drink water regularly throughout the day.
- Eat enough, even if your appetite decreases slightly at higher altitude.
- Get enough rest each night.
Most importantly, don’t try to “push through” feeling unwell.
The mountains will still be there tomorrow.
Travel Insurance Isn’t Optional
While it isn’t something you’ll pack inside your backpack, comprehensive travel insurance is one of the most important things you’ll bring to Nepal.
Before you travel, make sure your policy specifically covers:
- Trekking to your planned maximum altitude
- Emergency helicopter evacuation
- Medical treatment
- Trip interruption and cancellation
Many standard travel insurance policies exclude high-altitude trekking, so read the policy carefully before you leave home.
Cold Feet Tip
Carry a few sachets of oral rehydration salts.
They weigh almost nothing and can be surprisingly helpful after a long day of walking, particularly if you’ve had an upset stomach or simply haven’t drunk enough water.
What to Rent, Buy & Bring from Home
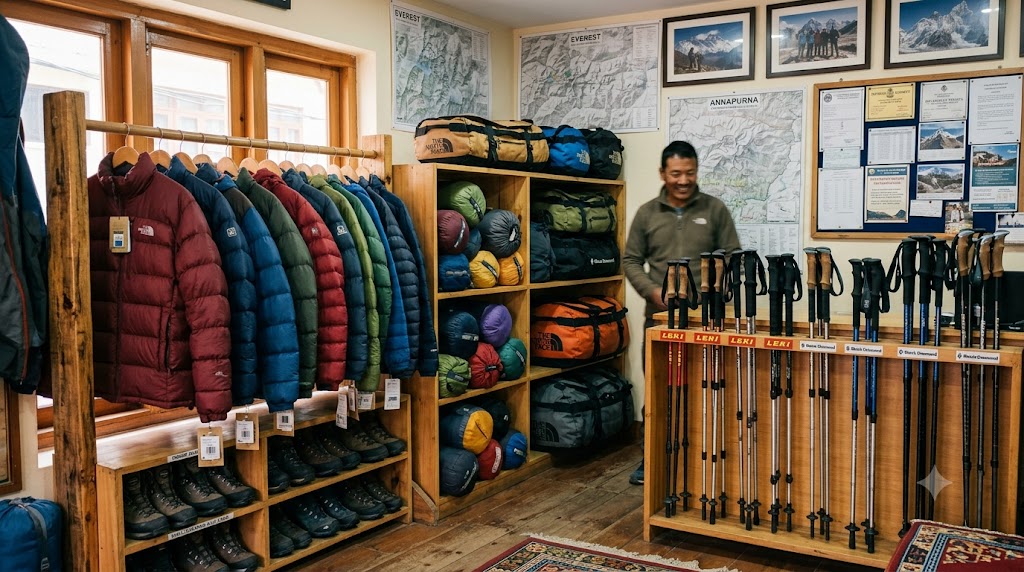
One of the biggest myths about trekking in Nepal is that you need to arrive with every piece of equipment already packed.
You don’t.
Kathmandu’s Thamel district has been supplying trekkers for decades. Within just a few streets, you’ll find hundreds of outdoor shops selling and renting everything from expedition down jackets to sleeping bags, trekking poles and backpacks.
That doesn’t mean you should rent everything.
Some equipment is worth bringing from home. Other items make far more sense to rent once you arrive.
Knowing the difference can save you both money and valuable luggage space.
Bring These From Home
Anything that directly affects fit, comfort or hygiene should ideally travel with you.
Bring:
- Broken-in trekking boots
- Base layers
- Trekking socks
- Underwear
- Sunglasses
- Personal medication
- Waterproof shell jacket
- Gloves (if you already own a comfortable pair)
Your boots deserve special attention.
No rental shop can provide boots that are already moulded to your feet. Even excellent boots become uncomfortable if they haven’t been properly broken in before your trek.
These Items Are Better to Rent
For many travellers, renting is the smarter option.
High-quality cold-weather equipment is expensive to purchase, bulky to pack and may only be used for a single trip.
Most reputable trekking shops in Kathmandu rent:
- Down jackets
- Sleeping bags
- Trekking poles
- Duffel bags
- Crampons (seasonal)
- Gaiters (winter treks)
Before leaving the shop, take a few minutes to check:
- Zips
- Buckles
- Drawcords
- Compression straps
- Pole locking mechanisms
A quick inspection in Kathmandu is much easier than dealing with faulty gear halfway through your trek.
Did You Know?
Renting a quality down jacket and sleeping bag can save several kilograms of luggage space and hundreds of dollars compared with buying new equipment before your trip.
What Should You Buy in Thamel?
Many smaller items are inexpensive enough that buying them locally is often easier than bringing them from home.
Good Items to Buy
- Buff or neck gaiter
- Wool hat
- Backpack rain cover
- Water purification tablets
- Dry bags
- Lightweight gloves
- Gaiters
- Trail snacks
You’ll also find pharmacies, supermarkets and convenience stores throughout Thamel selling sunscreen, lip balm, toiletries and other last-minute essentials.
Is Rental Gear Good Enough?
This is one of the questions we hear most often.
For most trekkers, yes.
Rental down jackets and sleeping bags from reputable trekking shops are more than adequate for popular teahouse treks such as Everest Base Camp, Annapurna Base Camp, Langtang Valley and the Annapurna Circuit.
The important part isn’t whether the equipment is rented.
It’s whether it’s clean, warm and in good condition.
Cold Feet Tip
Arrive in Kathmandu at least one full day before your trek begins. That gives you plenty of time to try on rental gear, replace anything you’ve forgotten and make adjustments without feeling rushed. A relaxed afternoon in Thamel is far preferable to discovering a missing item on the morning of departure.
Before You Buy Cheap Gear
Thamel is famous for its outdoor shops, and you’ll find equipment at almost every price point.
Some stores stock genuine international brands, while others sell locally made alternatives or imitation products intended for occasional use.
There’s nothing inherently wrong with buying affordable gear. Many locally made fleece jackets, hats and accessories perform surprisingly well for a single trek.
However, for equipment where safety, durability or warmth are critical—such as boots, waterproof shells and sleeping bags—quality matters far more than price.
If you’re unsure, ask your trekking company for recommendations. A reputable operator can usually point you towards shops that consistently provide reliable equipment rather than simply the cheapest option.
What Not to Bring
One of the biggest mistakes first-time trekkers make isn’t forgetting something essential.
It’s bringing far too much.
Every extra kilogram feels insignificant in Kathmandu.
It feels very significant somewhere above Namche Bazaar, climbing endless stone staircases beneath a thin mountain sky.
Experienced guides often joke that the easiest way to become stronger for trekking is simply to carry less.
Leave These Behind
- Large bottles of shampoo or body wash
- Multiple pairs of jeans
- Heavy cotton hoodies
- Thick winter coats instead of proper layers
- Hair dryers
- Portable speakers
- Camera equipment you won’t actually use
- Hard-shell suitcases for the trek
- Too many changes of clothes
- Expensive jewellery
Cotton deserves special mention.
It absorbs moisture, dries slowly and loses much of its insulating ability once wet. Synthetic fabrics and merino wool perform far better in the Himalayas.
Books are another common luxury that often stay buried in backpacks. If you enjoy reading, an e-reader or smartphone is usually a lighter alternative.
Many first-time trekkers also overestimate how much food they’ll need. Every major trekking route has teahouses selling snacks, chocolate, biscuits, noodles and surprisingly varied meals. A few emergency energy bars are sensible.
An entire grocery store is not.
If you haven’t used it on a multi-day hike at home, there’s a good chance you won’t need it in Nepal either.
Should You Buy Trekking Gear in Kathmandu?
This question appears on almost every Nepal trekking forum.
The honest answer is: it depends on what you’re buying.
Locally manufactured down jackets, fleece layers and backpacks have improved dramatically over the years, and many perform surprisingly well for classic teahouse treks.
However, technical equipment that your safety depends on—particularly mountaineering gear for extreme conditions—should always come from reputable manufacturers.
For most treks, there’s no need to replace perfectly good equipment you already own.
Comfort, fit and reliability matter far more than a famous logo.
Did You Know?
Many experienced guides in Nepal use locally made fleece jackets, hats and gloves every day.
Quality matters—but so does choosing the right piece of gear for the job.
Seasonal Packing Adjustments
The core packing list changes very little throughout the year.
What changes is which items become more important.
Spring (March–May)
Blooming rhododendrons, cool mornings and warm afternoons make layering particularly important. Dust can also become more noticeable before the monsoon arrives, so many trekkers appreciate carrying a buff or lightweight face covering.
Monsoon (June–August)
Waterproofing becomes more important than insulation.
Prioritise quick-drying clothing, extra socks and dependable rain protection over heavy winter equipment.
Autumn (September–November)
Often considered Nepal’s best trekking season, autumn offers stable weather, crisp mornings and exceptional mountain views.
A standard three-layer clothing system works perfectly for most routes.
Winter (December–February)
Winter trekking demands greater preparation rather than greater bravery.
A warmer sleeping bag, insulated gloves, thicker socks and additional mid-layers become essential once temperatures fall well below freezing.
Packing Tips from Our Trek Leaders
After preparing trekkers for departures season after season, our guides have noticed the same small habits separating comfortable trekkers from exhausted ones.
Pack smarter
- Keep heavy items close to your back for better balance.
- Use packing cubes to stay organised.
- Keep one complete set of dry clothes exclusively for evenings.
- Store tomorrow’s essentials where you can reach them quickly.
Keep these accessible
- Rain jacket
- Water
- Snacks
- Camera
- Sunscreen
- Gloves
- Hat
If you need to unpack your entire backpack every hour, your packing system probably needs simplifying.
Finally, line your backpack with a waterproof liner or heavy-duty dry bag.
Rain covers protect against showers.
A dry bag protects against long days of Himalayan rain.
Cold Feet Tip
Protect the clothes you’ll sleep in above everything else.
Ending the day in warm, dry clothing is one of the simplest comforts the mountains can offer.
Pack Less. Experience More.
Packing isn’t about preparing for the worst imaginable conditions.
It’s about preparing intelligently for the conditions you’re actually likely to encounter.
The Himalayas reward simplicity.
Bring clothing that layers well rather than garments designed for only one situation. Prioritise reliability over novelty. Choose comfort over appearance. Leave a little space in your bag for the unexpected—a locally knitted hat, a packet of Himalayan tea or a small souvenir from a village you’ll never quite forget.
The best-packed trekkers are rarely carrying the most equipment.
They’re carrying the right equipment.
Frequently Asked Questions
Can I rent everything in Kathmandu?
Almost everything.
Down jackets, sleeping bags, trekking poles, duffel bags and winter equipment are widely available to rent. Personal clothing, hiking boots and base layers are still best brought from home.
Do I need waterproof hiking boots?
Yes.
Waterproof boots provide valuable protection during rain, stream crossings and occasional snow while remaining breathable enough for long trekking days.
Is hiring a porter worth it?
For most trekkers, yes.
A lighter backpack reduces fatigue, lowers the risk of injury and allows you to enjoy the journey instead of constantly thinking about the weight on your shoulders.
How much should my backpack weigh?
As a general guide:
- Daypack: 5–7 kg
- Porter duffel: 12–15 kg (or according to your trekking company’s limit)
Packing lighter almost always makes trekking more enjoyable.
Can I charge my electronics?
Yes.
Nearly every teahouse offers charging facilities, although higher elevations often charge a small fee because electricity is generated from solar or local hydro systems.
A power bank reduces both cost and inconvenience.
Should I bring cash?
Yes.
Carry enough Nepalese rupees for personal expenses such as drinks, snacks, showers, charging fees and small purchases.
ATMs become scarce once your trek begins.
Is bottled water necessary?
No.
Refilling a reusable bottle and treating the water with purification tablets, a filter or a UV purifier is cheaper, more environmentally responsible and the approach most experienced trekkers choose.
Final Thoughts
Every trek through Nepal is different.
Some mornings begin beneath crystal-clear Himalayan skies. Others begin with clouds drifting silently through forests of rhododendron. The weather changes, trails are occasionally rerouted, and even the best itineraries sometimes need to adapt to the mountains.
Good packing is not about preparing for every possible scenario. It is about giving yourself the confidence to embrace whatever the journey brings without unnecessary discomfort or worry.
When you’ve packed well, your equipment quietly fades into the background. You stop thinking about your boots, your backpack, or whether you packed enough layers, and begin noticing the things that truly matter: prayer flags fluttering above suspension bridges, the smell of tea drifting from a village kitchen, children waving from stone houses, and distant peaks catching the first light of dawn.
Those are the moments you’ll remember long after the trek is over.
Everything else was simply what allowed you to be there.
Travel slower. See deeper.
If you found this guide useful, you may also enjoy:
- Nepal Trekking Cost Guide (2026–2027)
- Best Time to Trek in Nepal
- How to Choose the Right Trek in Nepal
- Altitude Sickness in Nepal: Prevention, Symptoms & Treatment
- Complete Guide to Trekking Permits in Nepal
- Everest Base Camp vs Annapurna Circuit: Which Trek Is Right for You?
Each guide is written from the perspective of people who live, work, and trek in these mountains throughout the year.
Leave a Reply